
It is a Rainbow Eggs world! You have just found the right place in case you are looking to inject a dose of joy and creativity in your home kitchen. As the name suggests; Rainbow Eggs are eggs that have been turned into a colorful rainbow of colors. This does not concern a holiday custom; this is an all year long event that combines art, science, and tasty food. Think of putting sunny side-up eggs in the color of beet juice. That is naturally pink or a deviled egg platter with each egg of a variation of pastel in a spring brunch.
The process of Rainbow Eggs is an easy, non-hazardous, and extremely entertaining family or couple activity and is a great way to add some magic to your meals. This guide will take you through all the facts. That you need to know including safest natural dyes as well as creative recipes. That will make Rainbow Eggs the show-stopper in any table. Stick it in your own kitchen and open a world of color!
What Are Rainbow Eggs?
When a majority of the population listens to Rainbow Eggs, at least they will think of Easter. Although eggs dyeing as a part of spring celebrations is a traditional one. The idea is vastly more inclusive and can be enjoyed on any day, throughout the year. At its very core Rainbow Eggs is the act of coloring eggshells, even the eggs themselves, by the use of safe coloring agents. These may be the commercial food coloring kits, dyes based on completely natural ingredients available in your kitchen, such as vegetables, fruits, and spices. The outcome is an artistic work of art that is beautiful and edible.
Yet Rainbow Eggs are not merely pretty, it is a wonderful method of making picky eaters taste eggs, a fun STEM project to teach children about colors, and natural pigments, and a tasty cooking method to impress the guests. They symbolize a change in perception of food as something to fuel on, and as something to experience, making ordinary food special and unforgettable.
The Joy of Creating Naturally Dyed Rainbow Eggs at Home
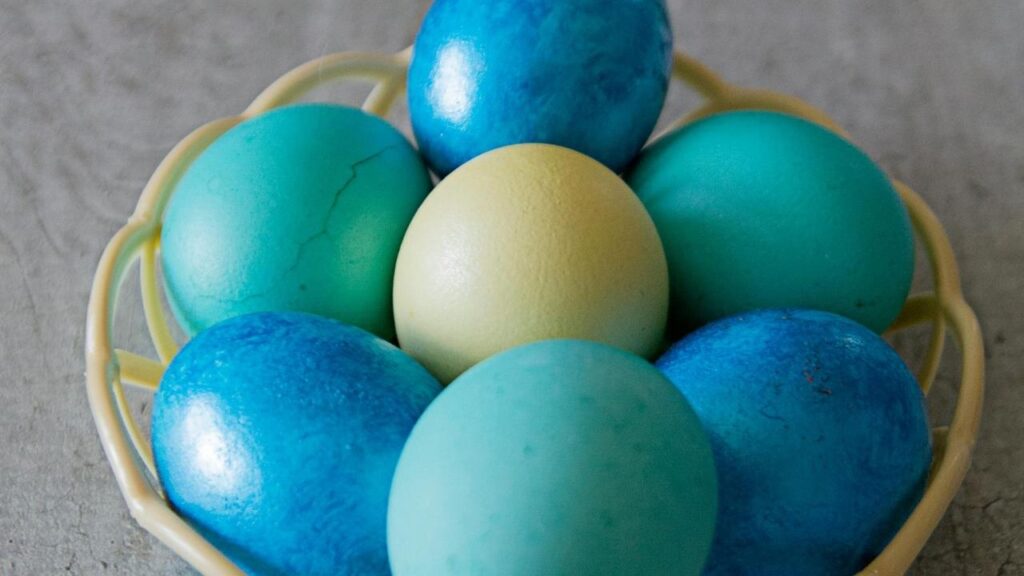
Making your Rainbow Eggs with natural ingredients is safe and healthier, also it will be an element of discovery and wonder in the process. It is the magic of the way how the first pieces of kitchen waste could be turned into the second wonder as they could make unbelievable colors. To make a beautiful spectrum, you can use red cabbage (which actually forms a lovely blue dye), skins of yellow onions (to form a beautiful orange or gold), beets (to form a beautiful pink or red), Turmeric powder (to form a beautiful yellow) and spinach (to form a soft green).
It is a very easy and meditative undertaking: you boil the ingredient of your choice in water (around 30 minutes to an hour) so as to yield the color, strain the liquid, and lastly, add a tablespoon of vinegar. Vinegar plays a very vital role because it ensures that the color binds to the eggshell. You would then put hard-boiled eggs into the chilled dye and leave them in the fridge. The more time they soak, the more the color. It is a low-key approach to learning sustainability as well as being associated with the old fashioned approach to cooking Rainbow Eggs.
A Simple Step-by-Step Guide to Your First Batch of Rainbow Eggs
Now you are ready to prepare your own Rainbow Eggs? Here is an infallible set of rules to begin with. First, hard-boil your eggs. Put them in one layer in a pot, pour cold water on them to the depth of about an inch, and put them into a rolling boil. After the boiling, switch off the heat, and cover the pot before letting the eggs rest within 10-12 minutes. Next place them in an ice bath in order to stop cooking. This also simplifies peeling them in the future in case you want to eat them. As the eggs cool, prepare your dyes. Select your natural sources of colors, as beets, chopped and boiled in water, to make pink, or turmeric to make yellow.
Once simmers are done, strain each dye liquid and add a tablespoon of white vinegar to the mixture and allow to cool to room temperature. Your hard-boiled eggs are cooled; put them in the dyes very softly, being well covered. Wrap the containers and refrigerate them. After half an hour check the eggs, or in the case of vibrant Rainbow Eggs it is best to leave the egg overnight. Blot them on a paper towel and marvel at your beautiful one!
Creative Ideas for Using Rainbow Eggs in Your meals
After having your pretty Rainbow Eggs, your fun does not end in the kitchen. They do not exist to look at; they are good to eat! The most evident application is that of a Rainbow Egg salad. Take chopped eggs, of various colours, and cut them into bits, then combine with mayonnaise, mustard, and a sprinkling of dill, in a dish as pretty to look at as it is good to eat. To make a spectacular pile of appetizers, make Rainbow Deviled Eggs. All you need is to prepare deviled eggs as usual, only with a combination of halves of egg whites of different colors.
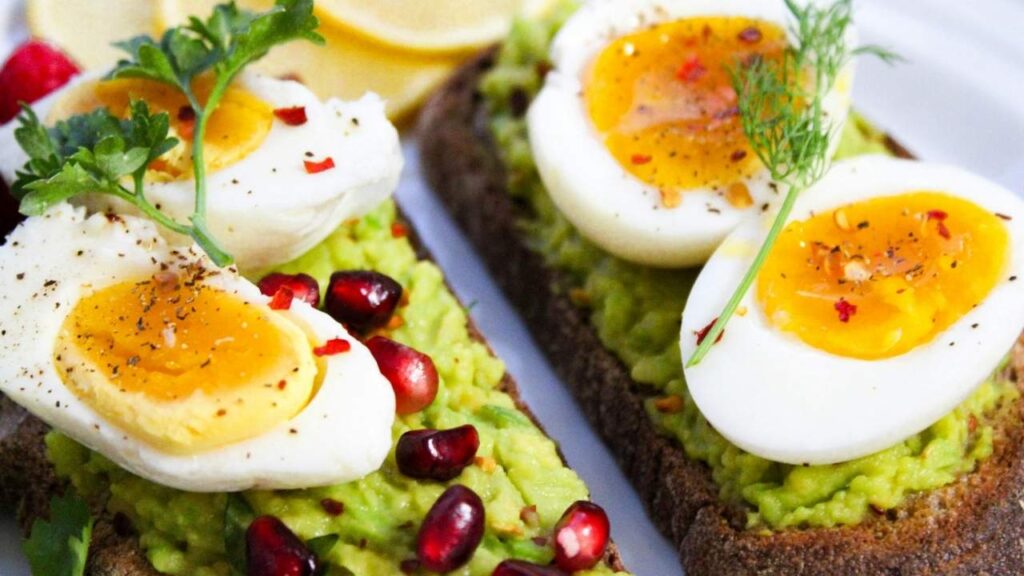
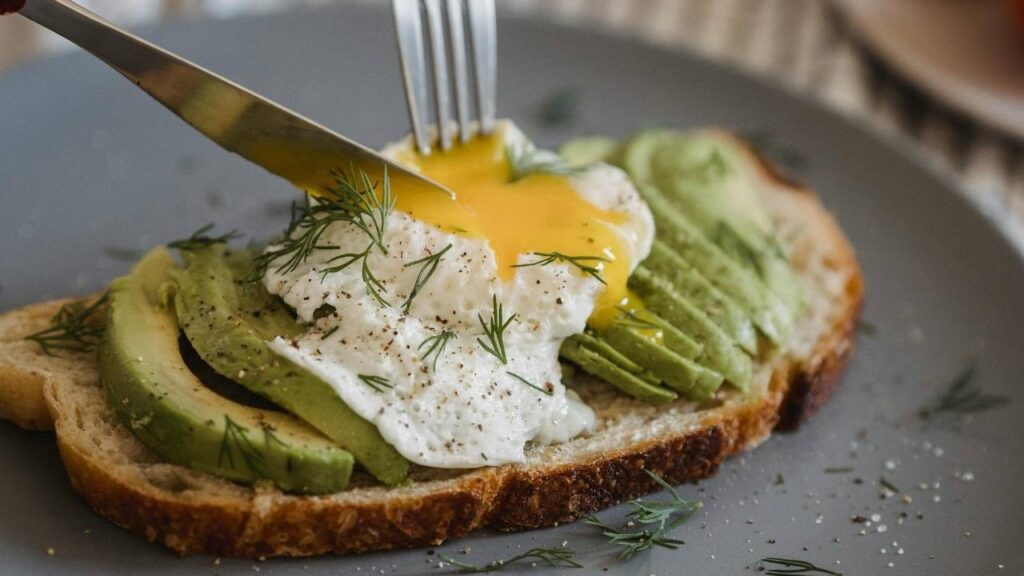
Put some tasty yolk filling in them, and you are going to have a plate that will astonish all your party guests. To have a healthy and enjoyable breakfast, cut your Rainbow Eggs and put them in a colorful avocado toast or a green salad top. Even a simple snack would be a special one when made of colorful shells. You can also make them with Cobb salads and give an actual twist to a traditional salad.
Rainbow Eggs for Kids: A Safe and Educational Kitchen Activity
One of the best kitchen activities that you can do with children is to make Rainbow Eggs. It is an on-the-job experience that is risk-free, informative and very fulfilling. Using the science concept, children can be taught on the origin of colors in the environment. They are able to predict: “Will the blue cabbage really turn into a blue egg? ” and then watch the amazing chemical action (with the help of the vinegar) go on. It teaches patience having to wait till the dyes develop. In younger children, it provides a nice chance to learn how to identify colors and to use fine motor skills.
And to further complicate the task you can give them crayons to draw on the egg before dyeing (the wax prevents the dye, which looks cool), or you can use stickers to create patterns. Since you are working with food-based dyes, it is not necessary to be concerned about stained little hands or that the eggs have become inedible. It is an ideal solution to making long-term family memories based on food and creativity.
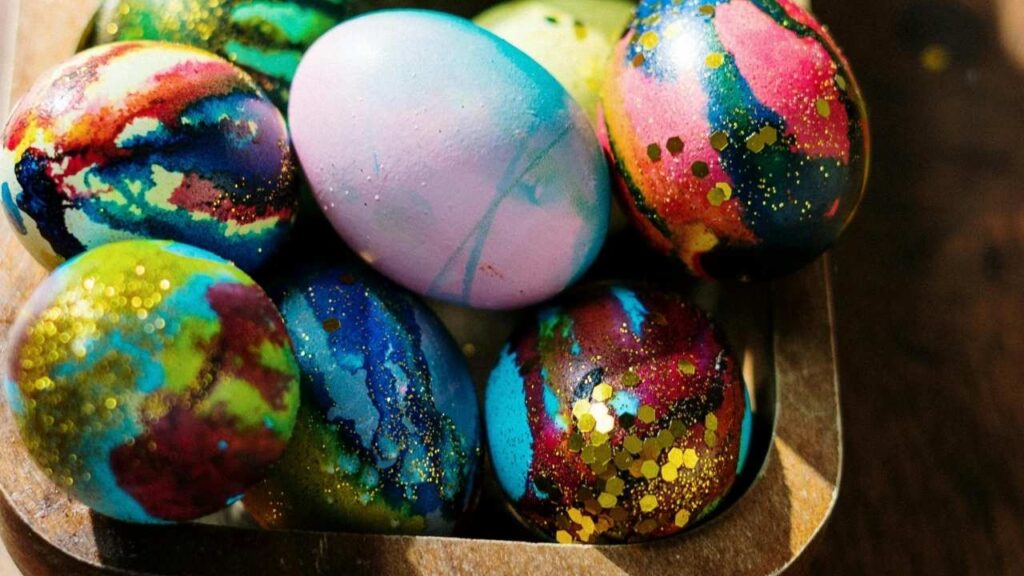
How to Make Rainbow Swirl and Marbled Eggs
Should you be willing to level up your Rainbow Eggs, you may employ the methods such as marbling or making swirl patterns. The techniques produce some breathtaking and special effects that are professionally produced. In the case of marbled Rainbow Eggs, a base color is necessary. Take an egg and dye it a light color such as yellow and allow it to dry entirely. Next prepare a shallow dish, to which one adds a teaspoon of vegetable oil and a few tablespoons of a darker dye (such as blue or purple). Break the dry light-coloured egg in this oily mixture with gentle rolling.
The oil will resist the dye in areas giving a beautiful organic marble effect. In the case of swirl Rainbow Eggs, whipped cream or shaving cream (in case of shaving cream, be sure that the egg was peeled before being consumed) is required. Put the cream in a pan, place dots of food coloring of varying colors on the surface and then swirl the colors using a tooth pick. Next, boil an egg, roll it through the creamy mixture and leave it to dry for a few minutes and then wipe the cream off to uncover a pattern of psychedelic swirls on the shell.
Storing and Displaying Your Beautiful Rainbow Eggs
Once you have the effort to make your edible art, you will want to experience it as long as possible. Proper storage is key. Since the dyeing technique requires the eggs to be left at room temperature in small intervals, you should store your completed Rainbow Eggs in the refrigerator in case of consumption. They will remain fresh in the period of one week. To avoid the absorption of the odors in the fridge, it is always best to keep them in a covered container. When you have prepared Rainbow Eggs just to decorate it and you will not eat it, you can preserve it for a very long time.
To achieve this, it is necessary to empty the contents of the raw egg before making the dye. This consists of making a small hole in both ends of the egg and blowing the yolk and the white out. Then you may dye the delicate unfilled shell. The Rainbow Eggs are also ornamental and can last forever and serve as nice home decor particularly when placed in a transparent vase or a decorative bowl as a focal point.
Natural vs. Commercial Food Dye for Rainbow Eggs
| Aspect | Natural Dye for Rainbow Eggs | Commercial Food Dye Kits |
| Ingredients | Kitchen-Based: Made from fruits, vegetables, and spices (beets, turmeric, spinach). | Laboratory-Made: Uses FDA-approved synthetic colorants. |
| Safety & Health | 100% Edible & Non-Toxic: Ideal for young children and those avoiding artificial dyes. | Generally Safe: FDA-approved, but some prefer to avoid artificial colors. |
| Color Results | Subtle & Earthy: Creates soft, muted, pastel shades that are unique each time. | Vibrant & Consistent: Produces bright, bold, and very predictable colors. |
| Preparation Time | Longer (Hands-Off): Requires simmering dyes for 30-60 minutes, plus long soaking time. | Faster (Instant): Just mix tablets with water and vinegar; dyeing is quick. |
| Cost & Convenience | Low Cost, Less Convenient: Uses existing kitchen items but requires more prep. | Higher Cost, More Convenient: Kits are inexpensive and very easy to use. |
Bring Color and Joy Home with Rainbow Eggs
Rainbow Eggs are not just another exciting project, they are an easy method to hopefully add creativity, learning and plain happiness to your home life. This exercise demonstrates that you do not require grandiose materials and fiddly dexterities to create something extraordinary. A small number of eggs, the most common vegetables and spices and just a little imagination will put you on a rainbow of potentials. Rainbow Eggs are the solution to your problem when you want to have a rainy-day activity with the kids, a more exciting breakfast on a weekday, and a cooking trick that you will impress your friends with. The next time you encounter a pack of eggs in your refrigerator, then you should treat it like a white piece of paper that needs a burst of color. Get your Rainbow Egg adventure going!
FAQ’s
1. Are natural dyes for rainbow eggs safe to eat?
Absolutely! The dyes are entirely safe and edible as they are produced out of such food as vegetables and spices. This renders them an excellent choice for children.
2. Why do I need to add vinegar to the dye?
Vinegar is a key ingredient. It is a soft acid that slightly etches the eggshell and this enables the natural pigment to adhesively cling to the shell and makes the color more vivid.
3. Can I make rainbow eggs with raw eggs?
To eat, hard-boiled eggs are the best. In case you wish to make decorative eggs which will last many years you may first blow out the contents of a raw egg and then dye the shell left behind.
4. My colors turned out light. What did I do wrong?
Natural dyes! This is to be expected! To get darker colors, you must leave the eggs in the dye much longer–you may leave them overnight in the refrigerator. The more time it is soaked the darker the color.
5. Can I use this method to dye brown eggs?
Yes, you can! Browning the eggs will give deeper, richer and more earthy colors than bright pastel ones that you can have on white eggs. It is an awesome experiment with various colour results.